 Reach
Test Relay path
Attempts an actual TURN allocation from Host. This checks reachability to the relay service, not the complete connection to your iPad.
REACH / CLOUDFLARE SETUP
Set up a relay connection, or add usage reporting to an existing relay. Follow the right token flow with real dashboard screenshots.
Checked September 22, 2026 · Cloudflare and Reach Host labels may vary by version.
Choose a task to see the permissions and fields you need. Enter the token only in Reach Host on your Mac.
Calls: Edit and
Account Analytics: Read.
Account Analytics: Read is needed. Keep the existing TURN key.
Sign in to Cloudflare and select your account. Copy its Account ID; this is different from your email, Zone ID, or TURN key ID.
Find Copy account ID in dashboard Search (⌘K), then paste it into the Account ID field in Host first. Then open Manage Account → Account API Tokens → Create Token.
Use a recognizable name such as
Reach Host Relay, then select
Start from scratch.
Name it Reach Host Usage and choose
Start from scratch.
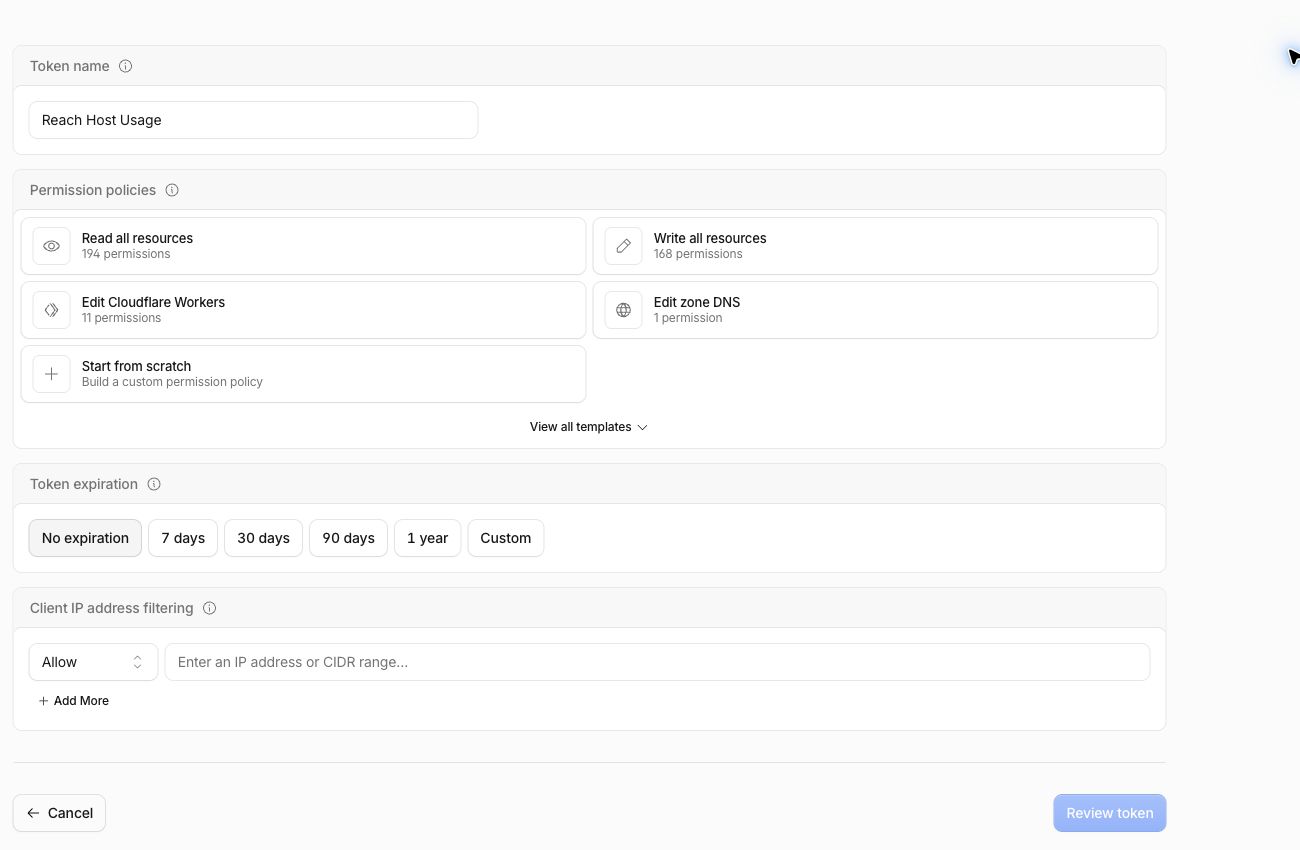
Select both permissions.
Media → Calls → Edit lets Host create the TURN key;
Analytics & Logs → Account Analytics → Read
allows usage queries.
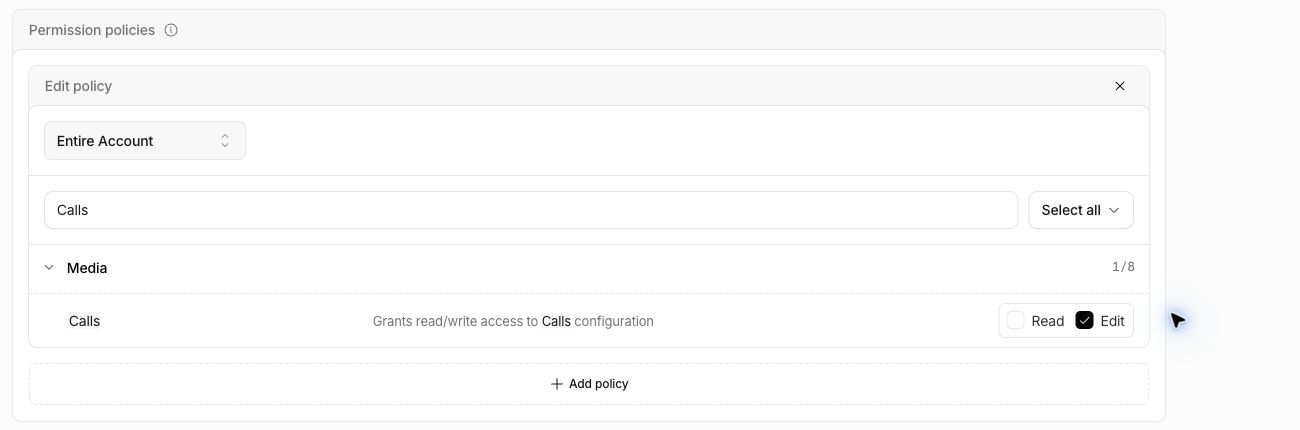
Select just
Analytics & Logs → Account Analytics → Read.
Calls: Edit is not needed for usage-only access.
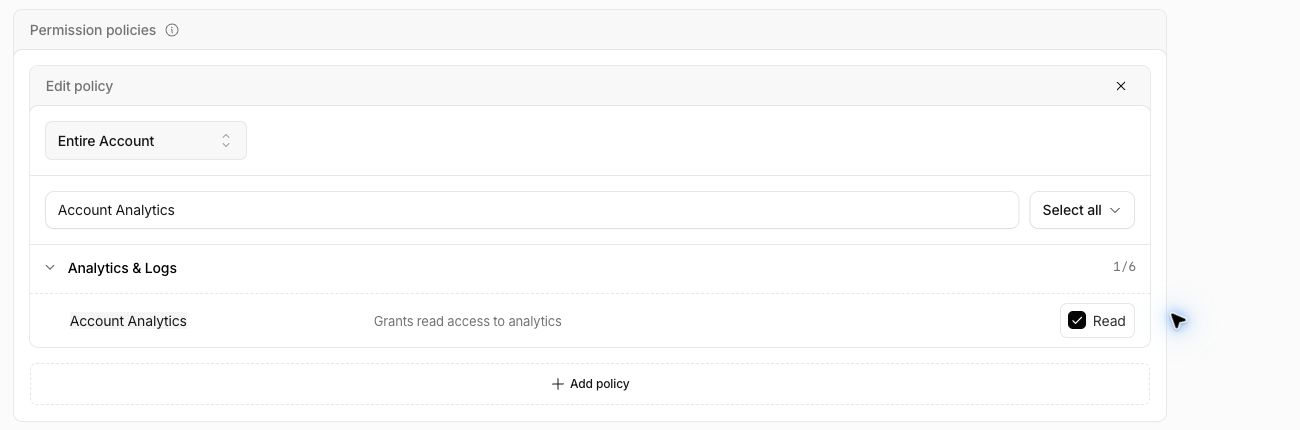
Review the name, account scope, permissions, and expiry before creating the token. Choose an expiry that fits your setup; the example’s 90 days is optional. Reach does not renew account API tokens automatically, so replace the token before it expires.
It is optional. Restrict it only when you know the Host’s public egress IP. Switching networks or hotspots can change that address and block token requests.
Open Reach Host status → Cloudflare relay → Set up…. Enter the values under Cloudflare settings → Cloudflare account API token.
Your selected Cloudflare account identifier
The secret token value you just created
Select Save account token and confirm the TURN key creation success message. Host creates the key automatically. You do not need a separate manual TURN key or temporary TURN username and password.
Open Reach Host status → Cloudflare relay → Manage… → Cloudflare settings → Usage settings, then Analytics account and read token.
The account that owns the current TURN key
Your Account Analytics: Read token
Select Save analytics credentials. Leave the existing TURN key ID and secret unchanged.
Credentials are stored in the Mac Keychain. Do not enter the account API token or TURN key in Viewer.
Attempts an actual TURN allocation from Host. This checks reachability to the relay service, not the complete connection to your iPad.
Turn on Enable read-only usage queries, select the period and scope, then select Refresh usage. Saving credentials or changing the period does not run a query.
Choose Last 30 days / This month / Custom. Month and custom boundaries use UTC. Bars compare Cloudflare egress and ingress traffic; they are not a free-quota balance or an invoice.
Provider reporting delays and the selected account or key scope can affect the result. Check pricing and actual charges in the Cloudflare dashboard.
Check that the token belongs to the selected account and is neither expired nor revoked. Initial relay setup needs Calls: Edit; usage reporting needs Account Analytics: Read. Check whether an IP filter excludes the Host’s current public address.
Analytics permission and relay reachability are separate. Check Test Relay path, Reach sign-in on both devices, and network restrictions. A successful usage query does not establish a video or input session.
No. Host also tries TLS 443, but Viewer still needs UDP connectivity. HTTP-only proxies and company or school firewall policies can prevent the connection.
Creating or editing account-owned Cloudflare tokens requires the account’s Super Administrator role. Ask an administrator for a narrowly scoped token; do not grant the token all administrator permissions.
Save a replacement under Manage… → Change account token. Replace a usage-only token under Usage settings → Analytics account and read token. Expiry of the account token does not revoke an existing TURN key.
Deleting the account token in Host removes the stored token and any local TURN key created by Reach. A manually entered TURN key is kept. Revoke the Cloudflare-side API token and TURN key separately in Cloudflare.
429 means the request was rate limited; refresh after the retry time shown in Host. If there are no records, check the period and account or TURN key scope. No records does not prove zero usage or charges.