 Reach
한 화면부터
네 화면까지.One screen.
Or four.
기존 모니터와 새 가상 화면을 함께 구성하세요. 같은 Mac의 여러 화면도, 서로 다른 Mac도 가능합니다.Combine existing monitors and new virtual displays, from the same Mac or different Macs.
YOUR MAC WORKSPACE, WITHIN REACH
Mac 한 대의 여러 디스플레이부터 여러 Mac 조합까지.
iPad에서
펼치고, 원하는 방식으로 작업하세요.Multiple displays from one Mac. Or a workspace across several
Macs.
Bring them together on your iPad.
macOS 14+ · iPadOS / iOS 17+macOS 14+ · iPadOS / iOS 17+
메모를 정리하고,
다음 아이디어로 이어갑니다.Collect your notes.
Make room for the next
idea.
let workspace = Workspace(
  screens: 4,
  layout: .yours
)
// Space for what’s next.
작업공간 구성 예시 · 실제 앱 화면은 버전에 따라 다릅니다.Layout illustration · App appearance varies by version.
MAKE IT YOUR WORKSPACE
화면마다 Mac과 디스플레이를 고르고, 작업공간을 프리셋으로 저장하세요. 필요한 만큼 추가하고 정리할 수 있습니다.For each workspace slot, choose a Mac and the display to use. Then save the workspace as a preset. Add or remove screens as your work changes.
기존 모니터와 새 가상 화면을 함께 구성하세요. 같은 Mac의 여러 화면도, 서로 다른 Mac도 가능합니다.Combine existing monitors and new virtual displays, from the same Mac or different Macs.
연결 전에 작업 화면 크기와 배율을 정하세요. 전송 해상도와 Mac 작업영역을 따로 선택합니다.Choose the display size and scaling before connecting. Mac workspace size and streaming resolution are separate settings.
터치로 빠르게, 키보드로 길게, 포인터로 정확하게. Mac의 시스템 오디오도 함께 들을 수 있습니다.Touch for a quick action, a keyboard for writing, a pointer for precision. Bring your Mac’s system audio along too.
REACH HOST FOR MAC
연결 상태와 필요한 권한을 확인하고, Cloudflare 중계와 사용량을 한곳에서 관리하세요.Check connectivity and permissions. Manage Cloudflare relay settings and usage in one place.
처음 연결할 때는 같은 네트워크에서 시작하면 편합니다. 원격 연결이 필요할 때 추가 설정을 진행하세요.Start on the same network for your first connection. Set up internet access when you need it.
설치와 권한 안내 →Installation and permissions →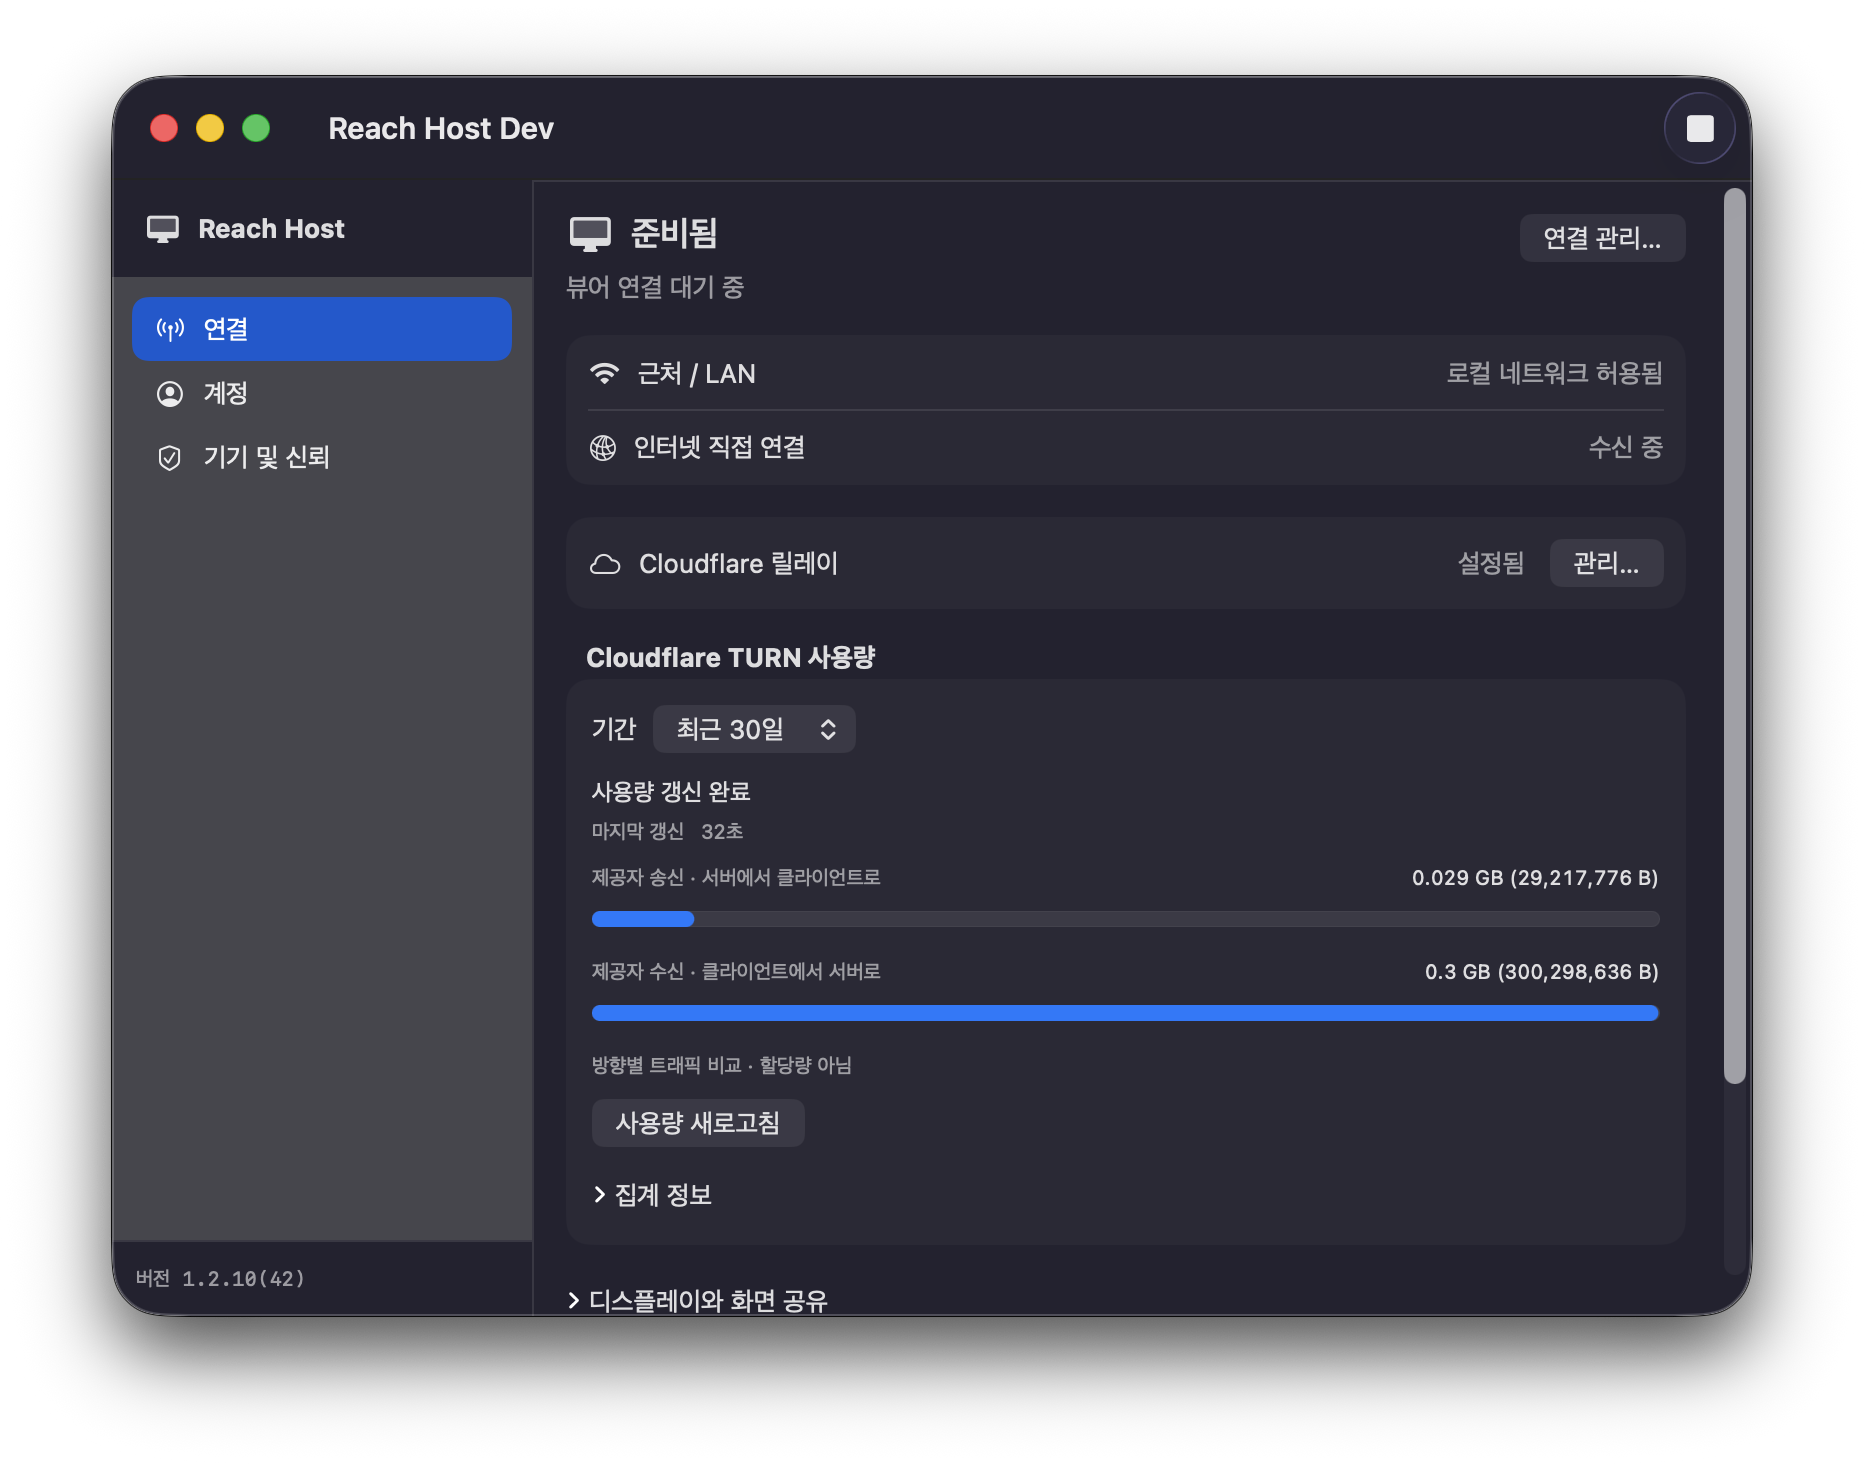
AT YOUR DESK. AWAY FROM IT.
연결할 수 있는 경로는 네트워크에 따라 달라집니다. 평소에는 자동으로, 필요할 때는 Mac별로 경로를 고르세요.Available paths depend on your network. Use automatic routing, or choose a route for each Mac when needed.
Mac을 찾고 페어링해 직접 연결합니다. Reach 계정이나 Cloudflare 설정 없이 시작할 수 있습니다.Discover and pair with your Mac directly. No Reach account or Cloudflare setup is required.
첫 연결 안내 →First connection →Reach 계정으로 기기를 연결하고 사용 가능한 직접 경로를 찾습니다. 계정 없이 주소를 직접 입력하는 방법도 있습니다.Use a Reach account to find available direct paths. Manual Direct IP is also available without an account.
원격 연결 알아보기 →Explore remote access →본인의 Cloudflare 계정으로 중계를 설정할 수 있습니다. 선택 기능이며 네트워크 제한과 Cloudflare 이용 요금이 적용될 수 있습니다.Optionally configure relay through your own Cloudflare account. Network restrictions and Cloudflare charges may apply.
Cloudflare 설정 가이드 →Cloudflare setup guide →BUILT AROUND TRUST
화면·오디오·입력은 Mac과 Viewer 사이에서 암호화됩니다. 중계를 사용해도 암호화된 세션 내용을 전달합니다.Screen, audio, and input are encrypted between your Mac and Viewer. Relaying a session carries that encrypted content.
계정, 기기 식별자, 연결 후보와 운영 로그는 세션 내용과 다릅니다. 무엇이 어디에 저장되고 어떻게 지우는지 설명합니다.Accounts, device identifiers, connection candidates, and operational logs are separate from session content. See what is stored, where, and how deletion works.
TWO APPS. ONE WORKSPACE.
조작할 기기에는 Viewer를, 연결할 Mac에는 Host를 설치합니다.Install Viewer on the device you use, and Host on the Mac you want to reach.
iPad · iPhone용 ViewerViewer for iPad and iPhone
App Store에서 보기 ↗View on the App Store ↗iPadOS / iOS 17 이상. iPad 중심으로 설계되었으며 iPhone은 실험적 지원입니다. 판매 조건과 제공 버전은 App Store에서 확인하세요.iPadOS / iOS 17 or later. Designed primarily for iPad; iPhone support is experimental. See the App Store for the available version and terms.
연결할 Mac에 설치Install on the Mac you want to connect to
Mac용 Host 다운로드 ↓Download Host for Mac ↓macOS 14 이상 · Apple Silicon 및 Intel. 최신 공개 릴리스의 설치 파일을 엽니다.macOS 14 or later · Apple Silicon and Intel. Opens the installer from the latest public release.
이 페이지는 새 작업공간 흐름을 소개합니다. 사용할 수 있는 기능은 각 앱의 배포 버전에 따라 달라집니다.This page introduces the new workspace experience. Feature availability depends on the released version of each app.
아닙니다. 같은 네트워크의 Nearby/LAN과 수동 Direct IP에는 필요 없습니다. 인터넷에서 직접 연결이 어려울 때 선택형 중계로 설정합니다.No. Nearby/LAN and manual Direct IP do not need it. Set up the optional relay when internet direct access is difficult.
기존 모니터를 사용하거나 새 가상 디스플레이를 만들 수 있습니다. 지원되는 크기와 배율은 Mac 환경에 따라 다르며, 선택한 작업공간 구성에 맞춰 사용합니다.Use existing monitors or create virtual displays. Supported sizes and scaling depend on the Mac and your workspace configuration.
네. 최대 네 화면 안에서 같은 Mac의 여러 디스플레이와 다른 Mac을 함께 구성할 수 있습니다. 연결 상태와 설정은 화면별·Mac별로 구분됩니다.Yes. Combine displays from one or more Macs in a workspace with up to four screens. Connection state and settings are scoped to each screen or Mac.
설치부터 첫 화면까지, 필요한 순서대로.From installation to your first screen, one step at a time.
CLOUDFLARE목적에 맞는 권한과 실제 발급 화면.The right permissions, with real setup screenshots.
SUPPORT연결, 화면, 입력 문제를 증상별로.Troubleshoot connections, displays, and input.